
 /
/ POST VIEW
0 / view. 1061 / date. 2023-10-25
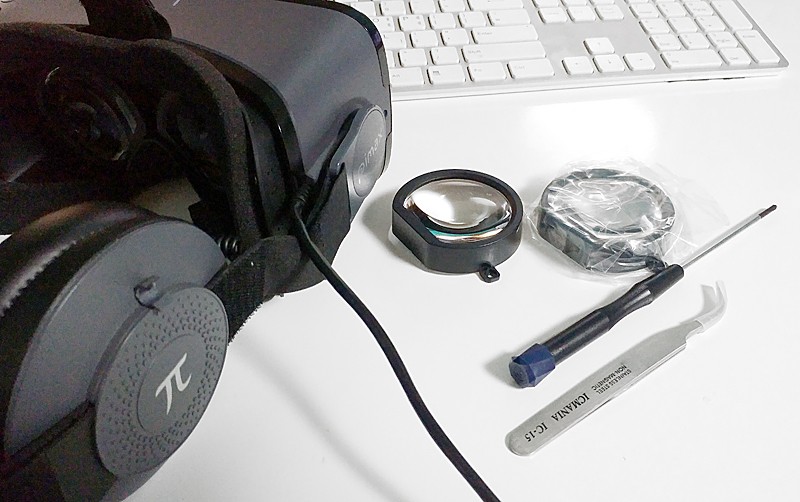
최초 발송분 렌즈 중앙촛점 이상문제로 렌즈킷 받고 오늘 교체를 해봤습니다.
분해영상을 참조해서 분해해 보면서 약간 덧붙여야할 사항을 적어보겠습니다.
혹시라도 다른것 때문이라도 분해하실 분 한번 참고해 보시라구요^^
[정정] 16.12.15 아래 비디오 가이드처럼 분해하면 너무 어렵고 위험합니다. 앞판은 빼지 마시고 안대 고무판만 떼세요..
앞판 떼고 분해하는것은 나중에 패널 같은것 교체 할 때나 하는 방법이구요.. 잘못하면 기기 나갑니다^^
그냥 고무판 나사 위 2개 아래 2개 사이드 왼쪽 2개 오른쪽 2개 푸시고요.. 살살 들어내서 그안에 패널기기랑 연결되어있는 나사
위/아래 각각 2개씩 => 4개 풀어내시고 안대 판을 떼어내시고 렌즈 교체하면 됩니다.
이렇게요~~
아래 방법 보다 쉽고 기기 쇼트날 걱정 없습니다.
====================================================
Repair guide video download:
https://mega.nz/#!jshHAS7L!gEdp7qEelMQft6O2ZhDppo3vQWYUdIDxidzoIb1sIn8

동영상처럼 작은 드라이버와 핀셋을 준비했습니다. 혹시 몰라서 약간 굽은 핀셋을 삿는데..
나사 주을 때 빼고 그다지 필요하지 않네요~
드라이버는 자석기능이 있는 드라이버를 쓰세요.. 나중에 구멍에 넣을때 애먹어요..

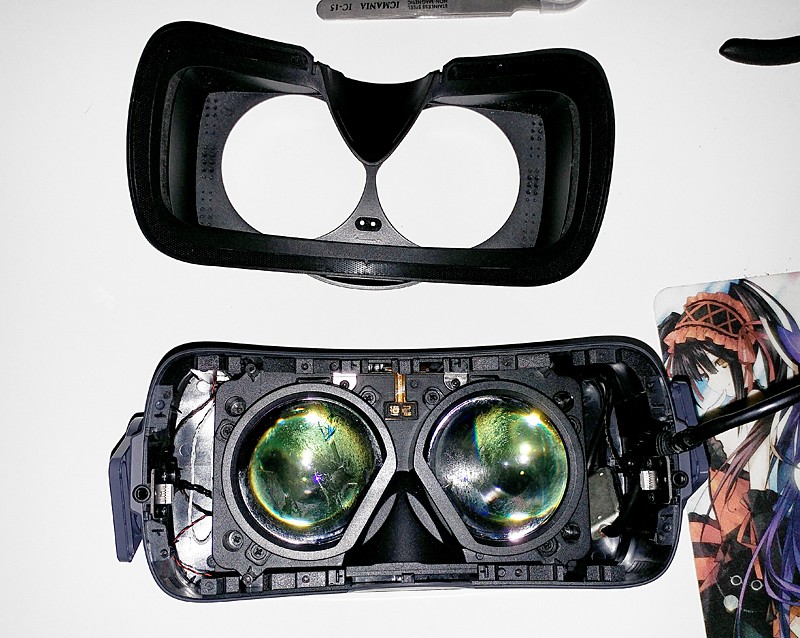
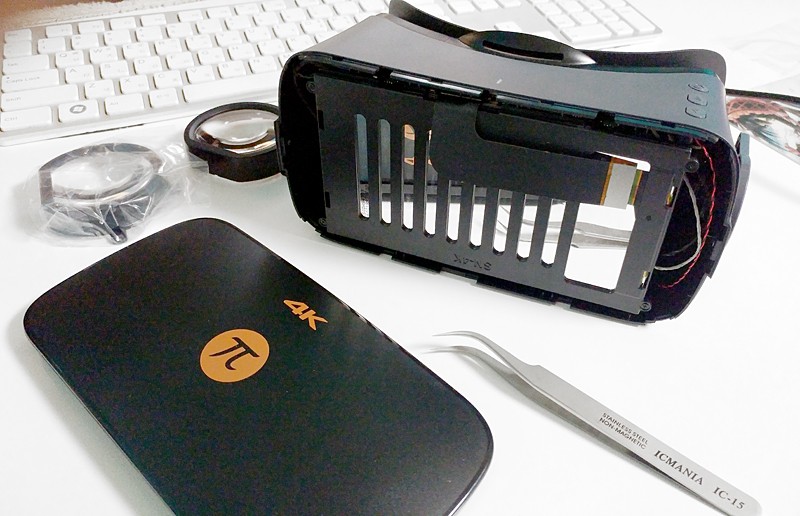
앞 뚜껑 분리 완료!

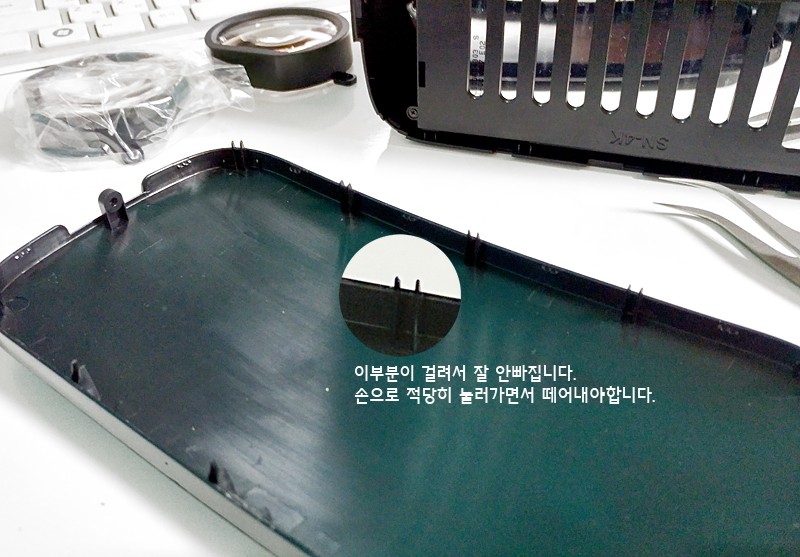
처음에 분리할 때 잘 빠지지 않습니다. 무리하게 빼시면 위의 사진에 뽀족한 걸림부분 다 부러지거든요..
손으로 살살 눌러서 오른쪽/완쪽부터 벌리고 가운데쪽을 살살 누르면서 떼세요..

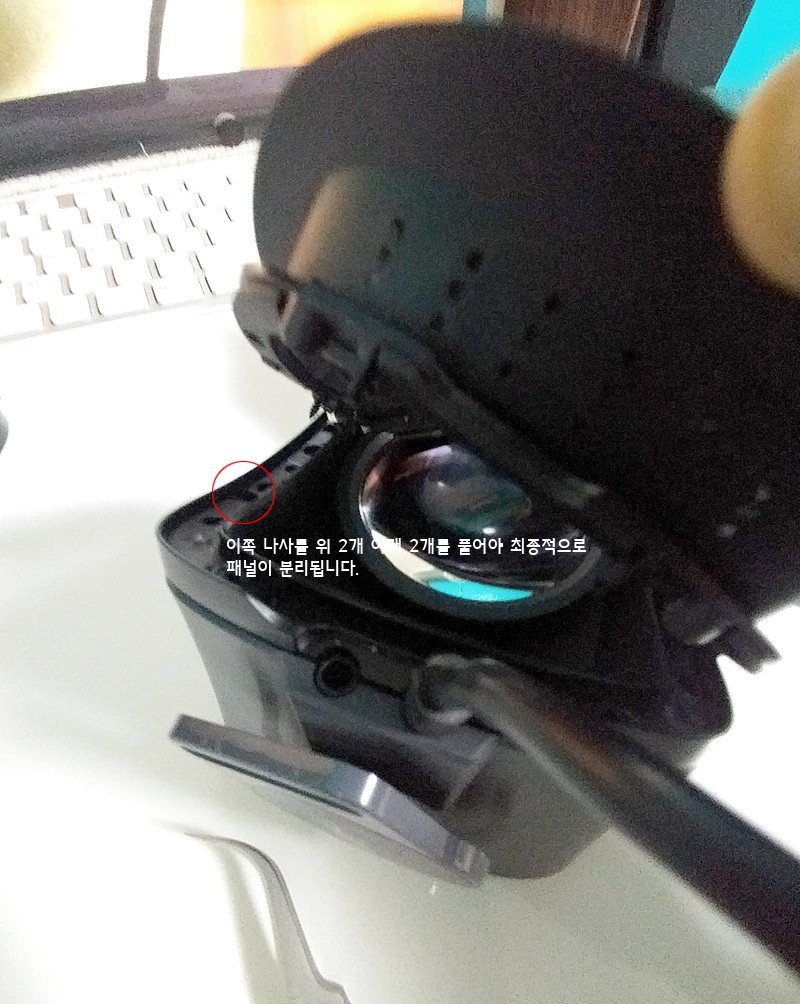
동영상에보면 안대고무부분을 벌려서 나사를 푸는 장면이 나오는데.. 위 2개 아래 2개 오른족 / 왼쪽 각각 2개씩 나사를 푸시고요... 위의 사진처럼 고무와 프라스틱을 완전벌려서 위/아래 나사 2개를 최종 풀어야 패널이 분리됩니다.
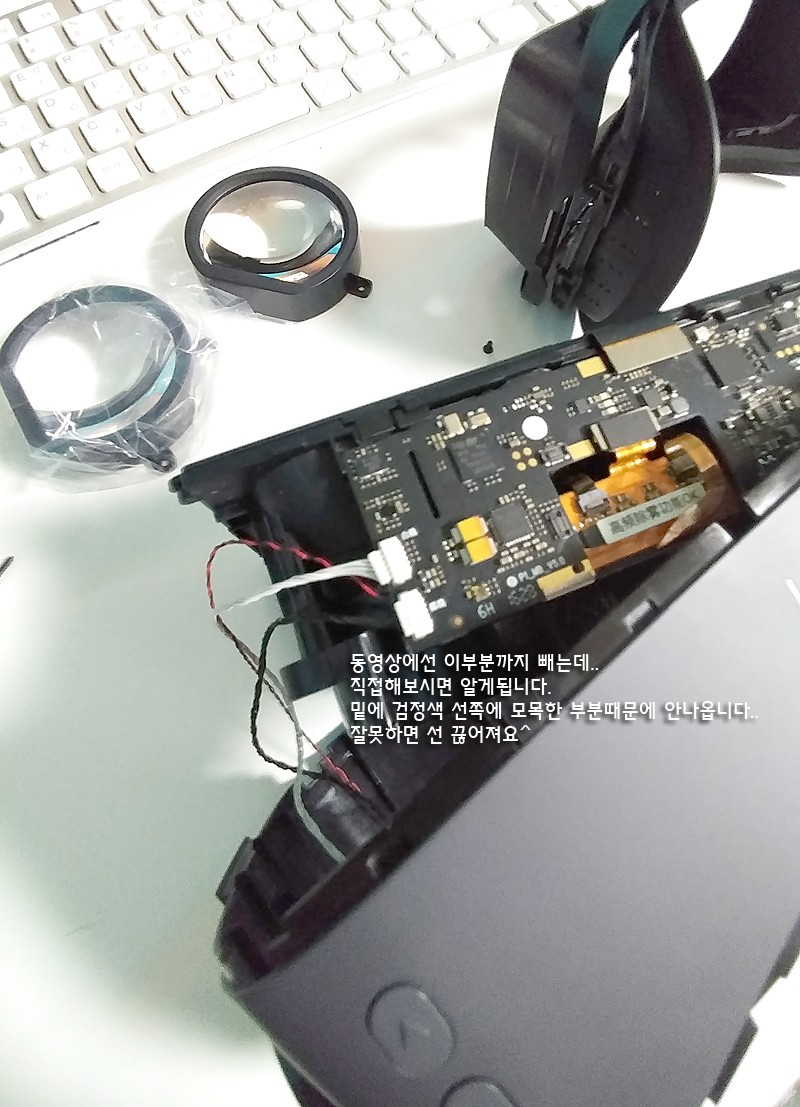
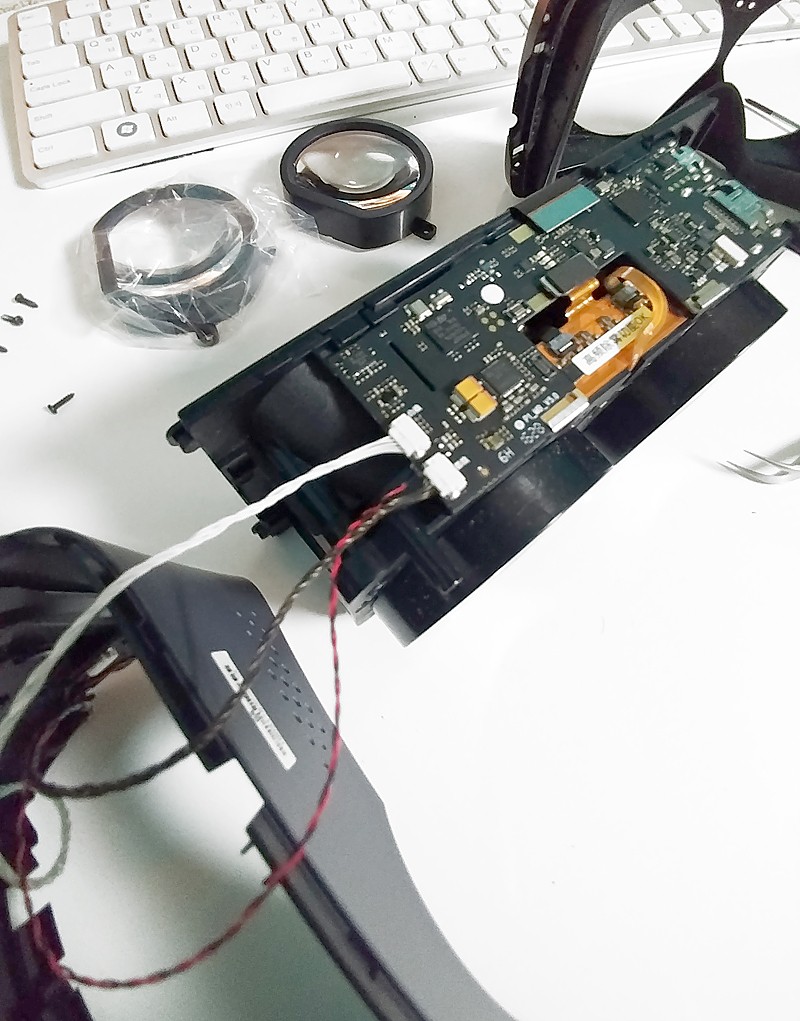
그리고 동영상에서는 왼쪽 빨강/하양/검정색 케이블을 제거하는데.. 꼭 할 필요는없어요.. 특히 검정케이블은 아래쪽에 홈으로 막혀 있어서 핀셋으로 아무리 잡아빼도 안빠집니다..(잘못하면 선 끊어져요..)
그냥 두고 아래 그림과 같이 오른쪽에 USB/HDMI/작은케이블 3개를 빼고 옆으로 돌려서 그냥 렌즈만 풀어내서 교체하면 됩니다.


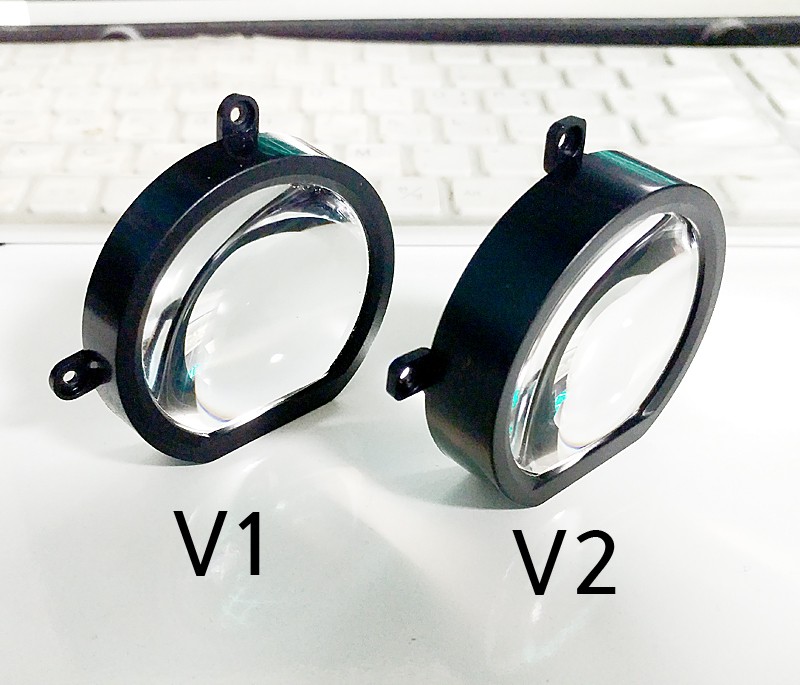
V2가 약간 높이가 더 높아서 눈과의 간격이 더 가깝겠네요^
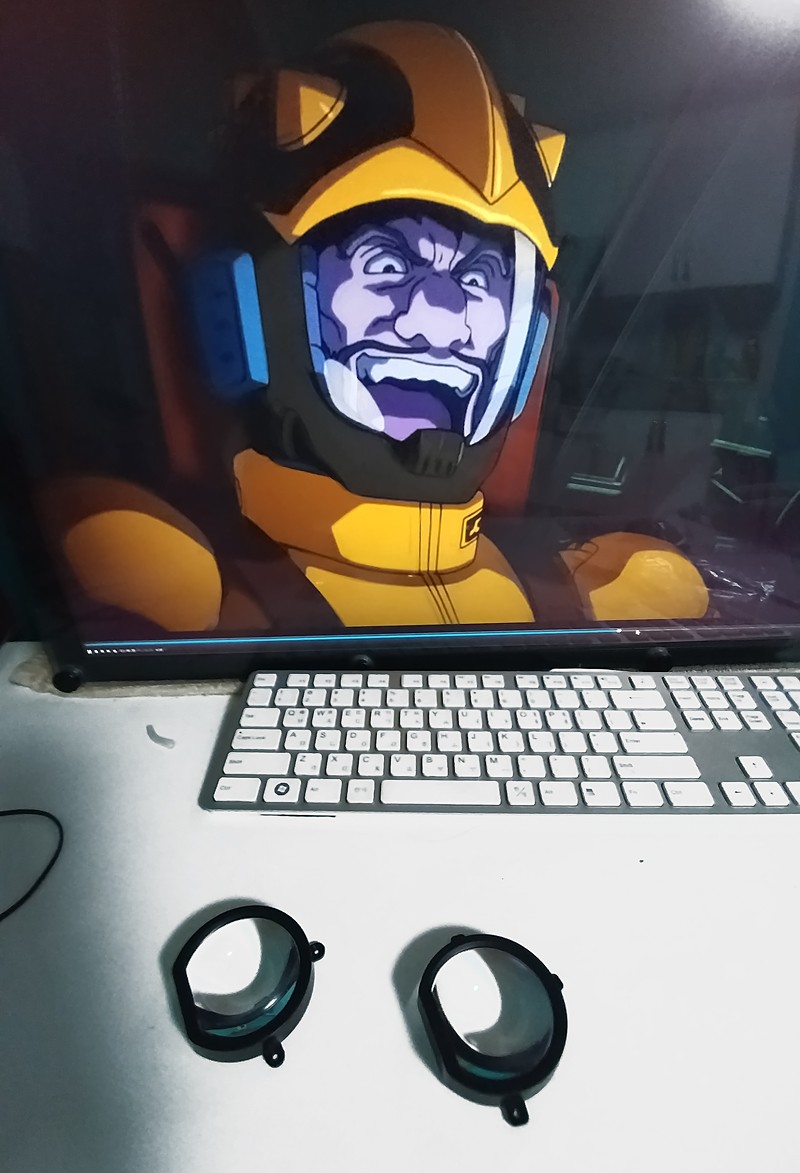
교체후 Piplay 연결 -> 우와 나온다^^ (성공적인 교체였습니다.)
교체한 렌즈를 달면 이것이 V2와 같다고 합니다.
비교를 해보면 V1은 가운데 초점이 안맞고. 위/아래/사이드 쪽 촛점이 잘 맞거든요..
그래서 영화 볼 때 약간 고개를 들고 보거나.. 눈동자를 사이드로 돌려보던 습관이 있었거든요..
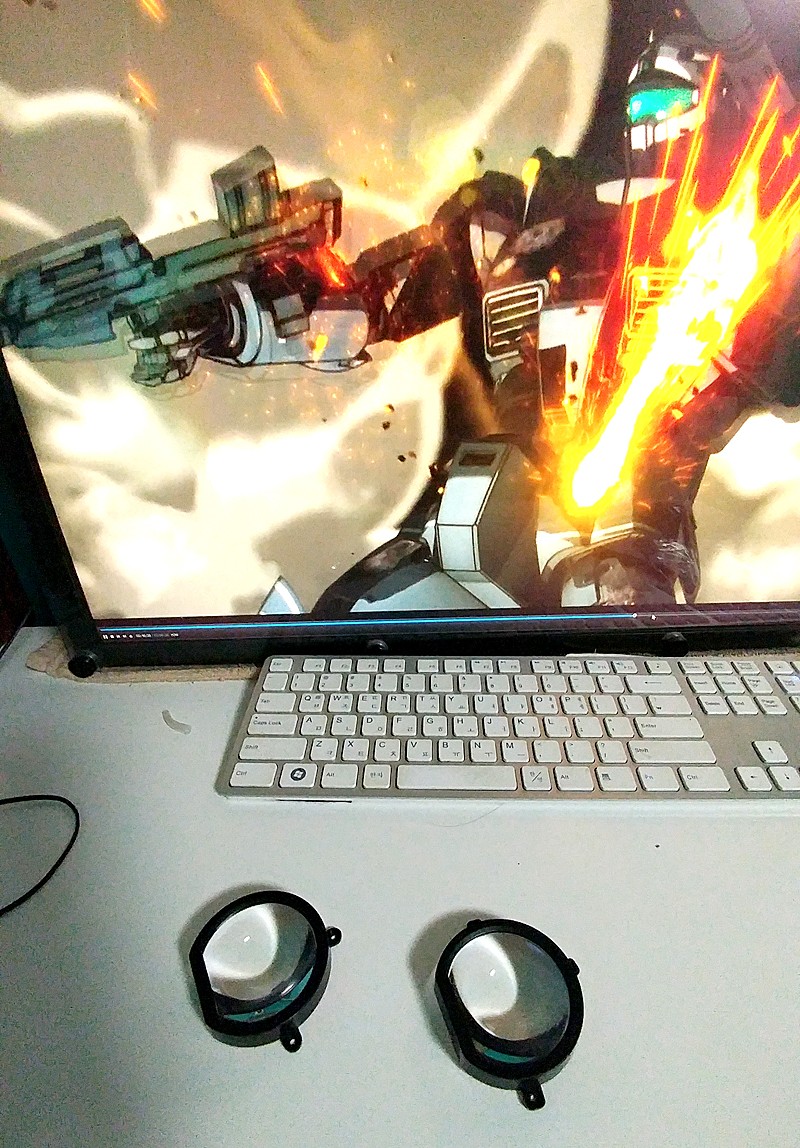
교체한 렌즈로 보니 가운데는 칼 초점이고요.. 사이드/위/아래가 약간 흐리네요..
차라리 가운데가 맞고 사이드가 흐린게 훨씬 편해요...
그동안 많이 어지러웠는데.. 만족이네요. (제눈 오른쪽/왼쪽 0.3이고요.. 근시에 약간 노안이 왔습니다.)
여분 렌즈킷으로 뭘할까 생각중입니다.
분해영상을 참조해서 분해해 보면서 약간 덧붙여야할 사항을 적어보겠습니다.
혹시라도 다른것 때문이라도 분해하실 분 한번 참고해 보시라구요^^
[정정] 16.12.15 아래 비디오 가이드처럼 분해하면 너무 어렵고 위험합니다. 앞판은 빼지 마시고 안대 고무판만 떼세요..
앞판 떼고 분해하는것은 나중에 패널 같은것 교체 할 때나 하는 방법이구요.. 잘못하면 기기 나갑니다^^
그냥 고무판 나사 위 2개 아래 2개 사이드 왼쪽 2개 오른쪽 2개 푸시고요.. 살살 들어내서 그안에 패널기기랑 연결되어있는 나사
위/아래 각각 2개씩 => 4개 풀어내시고 안대 판을 떼어내시고 렌즈 교체하면 됩니다.
이렇게요~~
아래 방법 보다 쉽고 기기 쇼트날 걱정 없습니다.
====================================================
Repair guide video download:
https://mega.nz/#!jshHAS7L!gEdp7qEelMQft6O2ZhDppo3vQWYUdIDxidzoIb1sIn8
동영상처럼 작은 드라이버와 핀셋을 준비했습니다. 혹시 몰라서 약간 굽은 핀셋을 삿는데..
나사 주을 때 빼고 그다지 필요하지 않네요~
드라이버는 자석기능이 있는 드라이버를 쓰세요.. 나중에 구멍에 넣을때 애먹어요..
앞 뚜껑 분리 완료!
처음에 분리할 때 잘 빠지지 않습니다. 무리하게 빼시면 위의 사진에 뽀족한 걸림부분 다 부러지거든요..
손으로 살살 눌러서 오른쪽/완쪽부터 벌리고 가운데쪽을 살살 누르면서 떼세요..
동영상에보면 안대고무부분을 벌려서 나사를 푸는 장면이 나오는데.. 위 2개 아래 2개 오른족 / 왼쪽 각각 2개씩 나사를 푸시고요... 위의 사진처럼 고무와 프라스틱을 완전벌려서 위/아래 나사 2개를 최종 풀어야 패널이 분리됩니다.
그리고 동영상에서는 왼쪽 빨강/하양/검정색 케이블을 제거하는데.. 꼭 할 필요는없어요.. 특히 검정케이블은 아래쪽에 홈으로 막혀 있어서 핀셋으로 아무리 잡아빼도 안빠집니다..(잘못하면 선 끊어져요..)
그냥 두고 아래 그림과 같이 오른쪽에 USB/HDMI/작은케이블 3개를 빼고 옆으로 돌려서 그냥 렌즈만 풀어내서 교체하면 됩니다.
V2가 약간 높이가 더 높아서 눈과의 간격이 더 가깝겠네요^
교체후 Piplay 연결 -> 우와 나온다^^ (성공적인 교체였습니다.)
교체한 렌즈를 달면 이것이 V2와 같다고 합니다.
비교를 해보면 V1은 가운데 초점이 안맞고. 위/아래/사이드 쪽 촛점이 잘 맞거든요..
그래서 영화 볼 때 약간 고개를 들고 보거나.. 눈동자를 사이드로 돌려보던 습관이 있었거든요..
교체한 렌즈로 보니 가운데는 칼 초점이고요.. 사이드/위/아래가 약간 흐리네요..
차라리 가운데가 맞고 사이드가 흐린게 훨씬 편해요...
그동안 많이 어지러웠는데.. 만족이네요. (제눈 오른쪽/왼쪽 0.3이고요.. 근시에 약간 노안이 왔습니다.)
여분 렌즈킷으로 뭘할까 생각중입니다.


좋아요
• Comments 0개